
Email: [email protected]

 English
 español
Industry News
HOME / NEWS / Industry News / How to Add a Belt Pouch to a Tool Belt: Attachment Methods and Fit Tips
HOME > NEWS > Industry News > How to Add a Belt Pouch to a Tool Belt: Attachment Methods and Fit Tips
How to Add a Belt Pouch to a Tool Belt: Attachment Methods and Fit Tips
 2026.11.09
 Industry News
Threading a pouch onto a work belt looks like the simplest job of the day, right up until the pouch spins around your hip mid-task or the clip lets go under a loaded bag. In our factory we sew belt pouches and tool belts every week, and the difference between a pouch that stays put and one that keeps fighting you almost always comes down to two things: how it is attached, and where it sits on the belt.
This guide covers the practical side of fitting a belt pouch to a tool belt, from measuring the interface and choosing an attachment method to positioning the pouch so your most-used tools stay within reach all day.
Measure the Belt and Pouch Interface First
Every attachment method depends on two numbers most people never check: belt width and belt thickness. A pouch sleeve cut for a 2 inch (50 mm) webbing belt will never sit still on a 1.5 inch belt, no matter how tight you pull it. Before you attach anything, take a few minutes with a tape measure:
- Measure the loaded belt, not a loose one. Webbing relaxes and stretches once tools are hanging from it, so measure while the belt is buckled and carrying weight.
- Check thickness as well as width. A spring clip sized for thin webbing may barely open over a double-layer leather belt, and a clip that only grips the top edge will rotate under load.
- Note the existing hardware: D-rings, PALS webbing rows, belt keepers, padded sections and any sewn-in stiffener all affect what will fit and where.
- Compare the pouch sleeve. A good sleeve is only slightly wider than the belt so it slides when you want it to but does not rock from side to side when you walk.
If you are choosing new gear rather than adapting what you already own, start from a pouch with a sleeve or webbing that matches your belt width. A 600D multi-tool waist bag with a wide, reinforced sleeve is a forgiving starting point because it works on most 2 inch work belts.
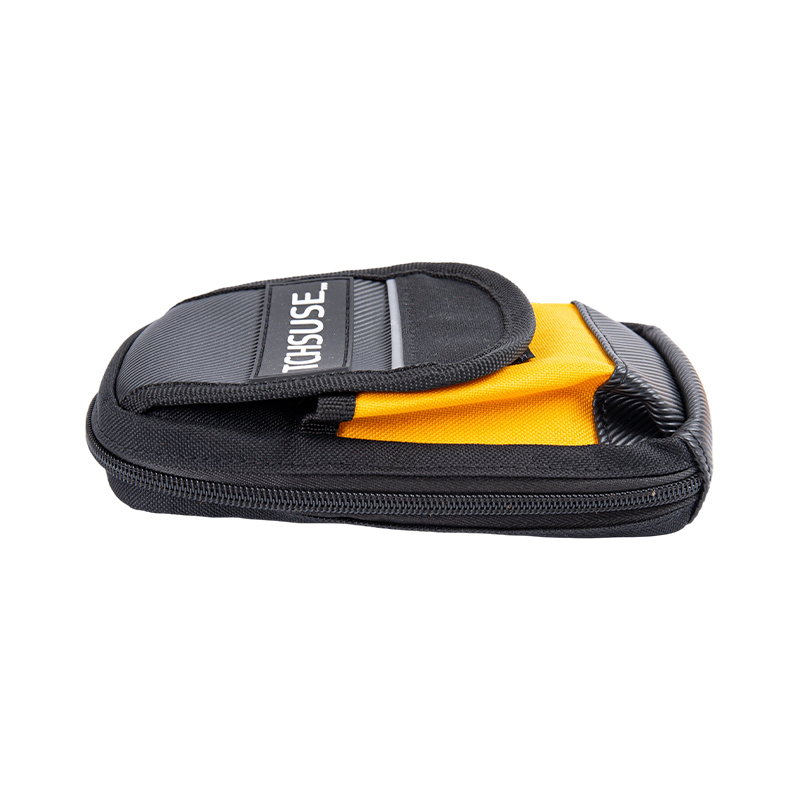 TCHSUSE 600D Multi-Tool Waist BagA durable 600D Oxford waist bag for electricians and maintenance work, with a wide sleeve that suits many 2-inch work belts.View Product →
Five Ways to Attach a Belt Pouch to a Tool Belt
There is no single best method, only the one that matches your pouch, your belt and how much weight you plan to carry. These five cover almost every belt pouch on the market.
1. Slide-on belt sleeve
The most secure option by a wide margin, and the one we recommend for anything that carries real weight. The pouch has a fabric tunnel on the back that the belt passes through, so the load hangs from the belt itself rather than from a clip. The trade-off is convenience: you usually have to unbuckle the belt and thread it from the free end. If the pouch has two sleeves, use both, because a single wide sleeve can still slide along the belt while two separated ones lock the pouch in position.
2. Spring clip or plastic clip
The fastest method, and perfectly serviceable for a secondary pouch you move between belts. Open the clip by squeezing the jaw rather than forcing it over the belt, slide it down until it seats, then tug the pouch firmly to confirm the clip has closed fully. Look for a clip with a small retaining lip on the lower jaw; that lip is what stops the pouch from walking its way up and off when you crouch.
3. MOLLE or PALS webbing
If your belt has webbing loops and your pouch has vertical straps, weave the strap through alternating belt loops, working top to bottom, then press the hook-and-loop tab down flat. This is the most stable option for a heavier pouch, and it spreads the load across several loops instead of concentrating it on one point.
4. D-rings, straps and carabiners
Hanging a pouch from a D-ring takes seconds, but a swinging pouch is tiring to carry and easy to snag. Keep this method for light items such as tape, fasteners or a phone, and use a locking carabiner so the gate cannot open against a ladder rung or a machine edge.
5. Adapter plates and bolt-on fittings
Some pouches ship with a rigid plate that bolts or rivets to the belt. It is the most permanent solution and overkill for most trades, but it makes sense where a pouch has to stay in exactly one position. Check the stitching and rivet backing before you commit, because a bolt-on fitting torn out of thin webbing leaves a hole behind.
| Method | Holding strength | On/off speed | Best for | Watch out for |
|---|---|---|---|---|
| Slide-on sleeve | High | Slow | Heavy main pouches | Requires unbuckling the belt |
| Spring or plastic clip | Medium | Fast | Secondary pouches | Can rotate on thin webbing |
| MOLLE weaving | High | Medium | Modular setups | Needs matching webbing rows |
| D-ring and carabiner | Low | Fast | Light items, quick swaps | Pouch swings and snags |
| Adapter plate, bolt-on | Very high | Permanent | Fixed single position | Hard to reverse later |
A Ten-Minute Fitting Walkthrough
Once you have picked a method, the fitting itself is quick. Work through these steps in order and you will avoid most of the frustration people blame on the pouch.
- Empty the pouch and lay out the tools you actually carry, not the ones you might carry one day.
- Measure the belt at the exact spot where the pouch will sit, since padded belts can be thicker at the hips than at the buckle.
- Loosen or unbuckle the belt and fit the sleeve, clip or webbing, keeping the pouch the right way up for your dominant hand.
- Set the height so the top of the pouch sits at or just below the belt line, which keeps the mouth of the bag reachable without looking down.
- Position it around the hip rather than the front of the body, slightly behind the hip bone for most trades.
- Test with gloves on. Put the pouch on, then sit, kneel, crouch and reach overhead; anything that digs in or restricts your leg will annoy you by lunchtime.
- Load it and check the balance. Heavy items belong closest to the body and closest to the middle of the belt, with lighter tools toward the ends.
- Retighten the belt, walk a lap and check for rotation or sag before you call it done.
Position the Pouch for Balance and Reach
A tool belt is a lever system, and a pouch full of screwdrivers hung in the wrong place will pull the whole belt around your waist with every step. Keep the load close to the body, spread weight around the hips rather than bunching everything on one side, and leave the buckle area clear so you can still adjust tension quickly.
Reach matters as much as balance. Watch how you work for a day: if you are constantly twisting to find a driver, the pouch is too far back; if it catches on benches and door frames, it is too far forward. A pouch with an adjustable rear sleeve, such as our 600D Oxford cloth waist bag, lets you fine-tune that position without changing belts.
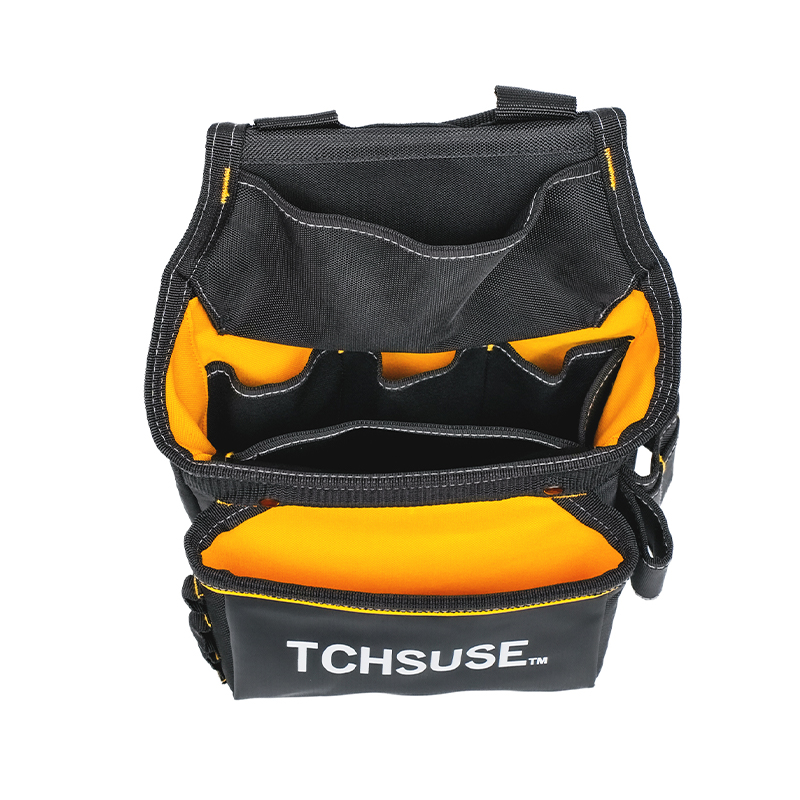 600D Oxford Cloth Tool Waist BagA water-repellent 600D Oxford tool waist bag with an adjustable rear sleeve, useful for high-altitude, electrical maintenance and construction work.View Product →
If you are still deciding between a single pouch, a multi-pocket setup or a full belt system, this overview of tool belt bag types and features is a useful next read before you commit to one layout.
Mistakes We See Most Often
- Overloading a clip-mounted pouch, then blaming the clip when it lets go on a ladder.
- Mixing belt and sleeve widths, which turns a secure pouch into a swinging one.
- Ignoring belt keepers, allowing the belt itself to slide out of position under load.
- Hanging everything on one hip, which tilts the belt and rubs the opposite side raw.
- Skipping the glove test, then discovering at height that the pouch blocks knee movement.
Check the Setup After a Week of Real Work
Give any new arrangement a week before you judge it. At the end of that week, look at the stress points: sleeve stitching, clip jaws, webbing loops and the belt itself. A pouch that has started to fray at the sleeve or leave a shiny mark on the belt is telling you the load is too high for that attachment method, so shift weight into a slide-on pouch or split the tools between two smaller bags.
Wipe down fabric pouches with a damp cloth, let them dry fully before reloading, and replace any plastic clip that has lost its spring. Small habits like these are the reason a well-fitted belt setup can last years rather than months.
Adding a pouch to a tool belt is not complicated, but it rewards a little planning. Match the sleeve to the belt, choose the attachment method that suits the weight, place the pouch where your hand naturally falls, and test it under real working conditions. Do that once and you will stop thinking about your belt entirely, which is exactly what good gear should allow. If you are sourcing pouches in volume, you can browse our tool belt bags to see the constructions and sleeve designs we build most often.
Related Products

Yancheng Tengchi Tourism Products Co., Ltd. It is dedicated to
designing and producing high-quality tool bags, including
heavy-duty electrician bags.
Experienced staff and experts are always available to provide
you with professional guidance and solutions to technical
problems.
- Product
- Tool Bag
- Tool Backpack
- Capabilities
- Capabilities
- Custom
- About US
- About Tengchi
- Certification
- Quick Connect
- Custom
- Capabilities
- Contact


