
Email: [email protected]

 English
 español
Industry News
HOME / NEWS / Industry News / How to Add a Belt Pouch to a Tool Belt: A Step-by-Step Attachment Guide
HOME > NEWS > Industry News > How to Add a Belt Pouch to a Tool Belt: A Step-by-Step Attachment Guide
How to Add a Belt Pouch to a Tool Belt: A Step-by-Step Attachment Guide
 2026.11.02
 Industry News
Few upgrades make a daily carry system feel as complete as a well-placed belt pouch. Whether you are an electrician, carpenter, or maintenance technician, adding a belt pouch to a tool belt puts the tools you reach for most right at your hip. In our years of making work bags and tool carriers, we have found that most people hesitate because they are not sure which attachment style will work with their existing belt. This guide walks through the common methods, the practical steps, and a few pointers that help you get the positioning right.
Belt Pouch Attachment Systems You Should Know
Belt pouches, sometimes called tool belt bags or hip pouches, attach in a handful of ways. Some use a loop on the back that slides over the belt. Others use a metal or plastic clip. Hook-and-loop panels and strap wraps are also common. The right choice depends on your belt width, how often you take the pouch off, and the weight you plan to carry.
| Attachment method | How it works | Best for |
|---|---|---|
| Loop-through | A fabric tunnel on the back slides over the belt | Leather and nylon belts with a consistent width |
| Clip-on | A spring or locking clip snaps onto the belt edge | Quick changes between belts and easy removal |
| Hook-and-loop | Wrap-around straps fasten with hook-and-loop material | Adjustable tension and belts with uneven widths |
| Slot and strap | A stiff backing with a slot threads onto the belt, often secured by a strap | Heavier loads and larger pouches |
If you want a dependable starting point, a multi-tool waist bag with a reinforced belt loop is a smart first addition to a standard work belt. Our 600D multi-tool waist bag uses this loop-through layout, with stitching sized for belts used on most job sites.
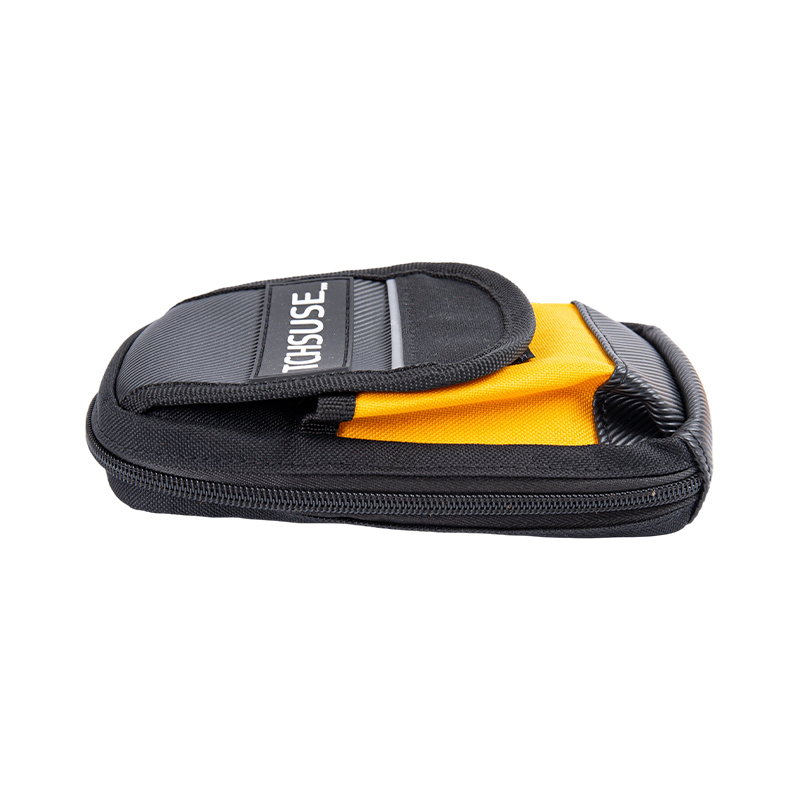 600D Multi-Tool Waist Bag with Reinforced Belt LoopA durable waist bag made of high-density 600D Oxford fabric, sized for standard work belts. Ideal for electricians and construction workers needing efficient tool storage.View Product →
Step-by-Step: How to Add a Belt Pouch
Whatever attachment style your pouch uses, the basic workflow is similar. Start with an empty pouch so you can handle it easily and see how it sits against the belt.
- Measure the belt width. Most work belts range from 2 to 4 inches. The pouch loop or backing should be slightly wider than the belt so it slides without forcing.
- Loosen or remove the belt if you can. For an open-ended loop, slide it over the buckle end before buckling the belt. This saves you from fighting with the buckle.
- Slide the loop over the belt and move the pouch to the position you plan to use. If the loop is tight, work it gradually; do not tear the stitching.
- For a clip-on pouch, open the clip, press it over the belt edge, and let it click into place. Make sure the clip sits flat and does not pinch the belt material.
- For a strap-style pouch, wrap the straps around the belt, then fasten them on the inside or outside of the pouch according to the design.
- Give the pouch a firm tug. A correctly attached pouch should not shift more than an inch when you pull it.
After you load the pouch, check the attachment again. Belts settle and webbing compresses, so a minor re-tightening after a few minutes is normal.
Positioning and Load Balance
Once the pouch is on the belt, where you place it matters as much as how you attach it. In our experience, the ideal spot is just forward of the hip bone on your dominant side for tools you use most, or on your non-dominant side for tools that support your main hand. Avoid placing the pouch directly at the center of the back, where it can press against your spine and make bending awkward.
Finding the sweet spot
- Start with the pouch near the front of your hip, around the 10 o'clock or 2 o'clock position depending on your handedness.
- Move it in small increments until you can reach it without raising your elbow above your waist.
- If you are carrying more than a few pounds, split the load between two smaller pouches rather than one large one.
- Keep your belt tight enough that the pouch does not sag, but not so tight that it digs into your waist.
A stable pouch also helps with safety. When you are on a ladder or working in a cramped space, a tool that stays put is less likely to catch on something or swing into you.
Compatibility Considerations
Not every belt is the same. A leather belt with a fixed width behaves differently from a nylon webbing belt with a quick-release buckle. If your pouch has a loop, it generally needs to match the belt width and thickness. If it uses a clip, the clip jaw should open wide enough to fit the belt plus a layer of material.
- Leather belts are more rigid, so a loop with a little extra room is easier to slide.
- Nylon belts tend to have a smoother surface, which makes clip-on pouches a convenient choice.
- For unusual belt widths, look for a pouch with an adjustable flap or a secondary strap that can tighten around the belt.
- If the pouch has a D-ring or webbing loop, a short connector strap can be used to attach it to the belt.
Because material affects how well a pouch stays in place, it helps to understand the differences between leather and nylon belt bag designs. Our tool belt bag guide covers the main types and features in more detail.
Common Fit Problems and Quick Fixes
Even when you follow the steps, a pouch can feel awkward on the first day. Here are the issues we hear most often from users and what usually solves them.
- Pouch slides forward. Tighten the belt one notch, or look for a pouch with a non-slip backing. On very smooth nylon belts, a small rubberized strip can make a big difference.
- Loop is too tight. Work the belt through slowly, a few inches at a time. If it still resists, the loop may be intended for a thinner belt.
- Clip keeps springing open. Check whether the clip jaw is smaller than the belt thickness. If so, use a clip-style pouch with a wider opening or switch to a strap method.
- Pouch swings when you climb. Move the pouch closer to your hip joint and reduce the weight inside. A lighter pouch with fewer loose tools will swing much less.
Most issues are not caused by the belt itself. They come from a mismatch between the pouch attachment and the belt's width or surface. Taking a quick measurement before you buy saves time later.
Choosing the Right Belt Pouch
The best belt pouch for your tool belt depends on fit, material, and pocket layout more than any single brand. We recommend looking for reinforced stitching at stress points, a backing that will not curl after months of use, and a closure that stays closed when you bend or climb. The fabric weight also matters. Many of the waist bags we manufacture use 600D oxford cloth because it balances abrasion resistance with flexibility, so the pouch holds its shape without feeling stiff.
For a purpose-built option, the 600D oxford cloth waist bag in our line is designed with the same practical thinking: a stable attachment, enough separation for small tools, and a slim profile that does not get in the way.
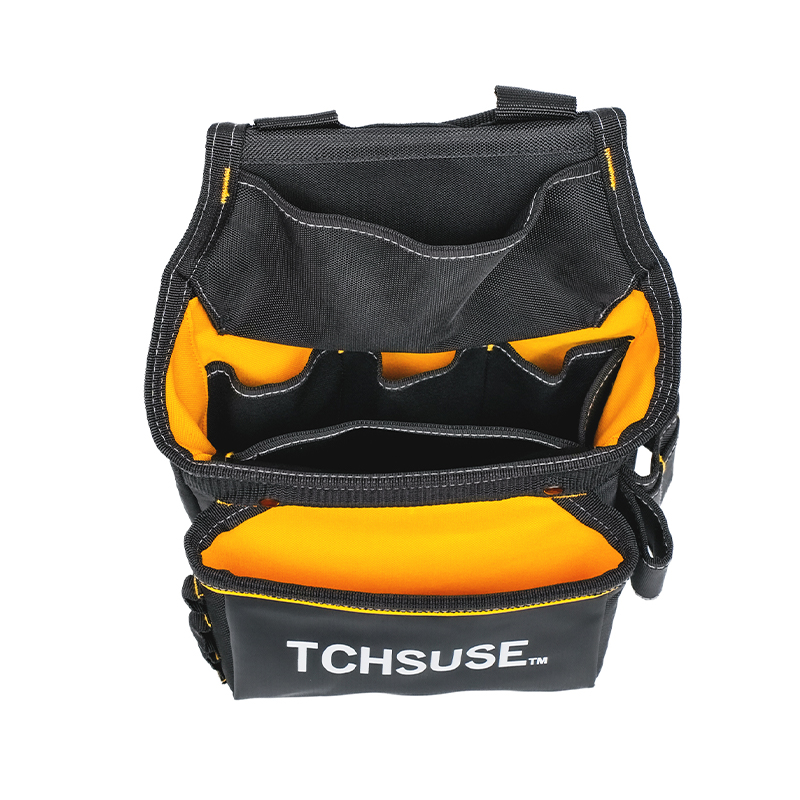 Water-Repellent 600D Oxford Cloth Waist Bag for TradesThis waist bag features wear-resistant, water-repellent fabric built for harsh job sites. Designed for high-altitude work and electrical maintenance, it keeps tools secure and accessible.View Product →
Bringing It Together
Adding a belt pouch to a tool belt is a small change that can have a noticeable impact on your workflow. By matching the attachment style to your belt, taking time to position the pouch correctly, and choosing a pouch made with durable materials, you avoid the common complaints of sagging, wobbling, and uncomfortable carry. Start with one pouch, keep it light during the first week, and adjust the placement as you move through your normal tasks. Once you find the right setup, it becomes second nature.
Related Products

Yancheng Tengchi Tourism Products Co., Ltd. It is dedicated to
designing and producing high-quality tool bags, including
heavy-duty electrician bags.
Experienced staff and experts are always available to provide
you with professional guidance and solutions to technical
problems.
- Product
- Tool Bag
- Tool Backpack
- Capabilities
- Capabilities
- Custom
- About US
- About Tengchi
- Certification
- Quick Connect
- Custom
- Capabilities
- Contact


